
Introduction#
Description#
This chapter describes the basic operation of the Zmaster GUI environment. When the program is executed, the main window will pop up as shown below. Various components of the screen are illustrated in the figure, and the main window is divided into three sub-frames.
The largest frame serves as the active drawing area.
The bottom frame is a Log window (which is not equivalent to a command line).
To the right, there is a toolbar frame containing a column of buttons, along with the trackball/visualization utility at the bottom.

Note that this application operates as a single “document” interface. The term “document” is more accurately referred to as a project, which consists of multiple input and output files. Generally, the program will attempt to locate the available files by their extensions. However, non-standard startups can be created by explicitly including the extension for a particular file. For example, to load an Abaqus results file into Zmaster:
Zmaster calc.fil
Geometry, plot information, custom post-processing calculations, etc.,
which were created interactively, are stored in problem.mast``.mast`` file.
The format of this file is described in the File Formats chapter. It is an ASCII file that can be edited using a text editor or manipulated through text processing commands in scripts.
The toolbar is divided into three columns of “commands”:
The first column represents the primary functionality of the program.
The second column contains secondary tools related to the currently selected main command.
The third column provides additional options, such as meshing utilities within the geometry command.
Main commands are loaded automatically based on what has been installed on the system. Depending on the Zmaster release, the number of buttons may vary, with more or fewer buttons appearing.
The major commands are summarized below:
Main commands |
Description |
|---|---|
|
Create a 3D geometries and define planar meshes. |
|
Visualize 2D or 3D meshes, with mesh editing features. |
|
Various data plots and export of column data. |
|
Results visualization and animations. |
|
Simulator and Optimizer. |
|
Run a Z-set problem from within Zmaster. |
Menu bar#
File tab#

Commands |
Description |
|---|---|
|
allows to open Z-set files (.inp, .mast, .geo[f], .ut, etc) or external file formats. |
|
save the progress of the current project. |
|
load/unload additional meshes in the same visualization area. |
|
print or export meshes or results in eps file. |
|
exit the Zmaster GUI. |
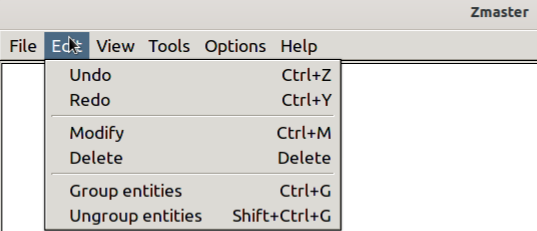
Edit tab#
Commands |
Description |
|---|---|
|
undo the last command. |
|
redo the last command. |
|
modify the selected entity. |
|
delete the selected entity. |
|
group entities to make one entity. |
|
ungroup entities to the original number of entities. |
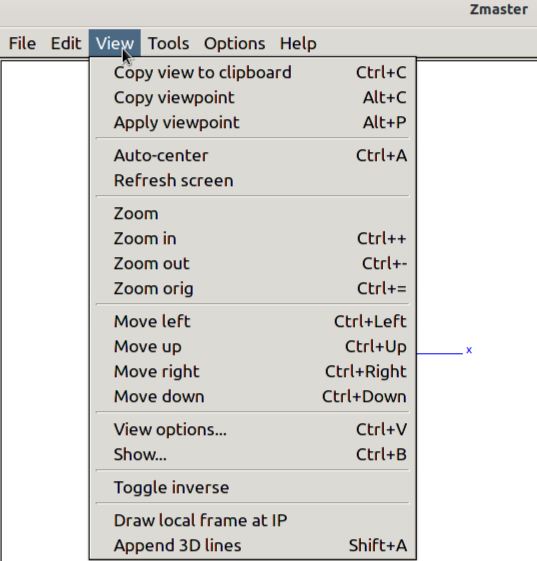
View tab#
Commands |
Description |
|---|---|
|
copy the desired viewpoint to clipboard. |
|
copy the desired viewpoint. |
|
apply the copied viewpoint to a second opened Zmaster interface. |
|
show the whole mesh and centered it at the origin of the global axis. |
|
Zoom options. |
|
move the whole mesh left/up/right/down. |
|
open a widget to select elsets to view, set view options (view center,angle of view, rotation center, …) |
|
show details such as element numbers, node numbers, Gauss point numbers and result values for a desired elements, node, Gauss points. |
|
toggle between light and dark mode for the drawing area. |
|
draw the local frame at Integration points |
|
append 3D lines given by a list of points (from a file). These lines are only for visualization purposes. |
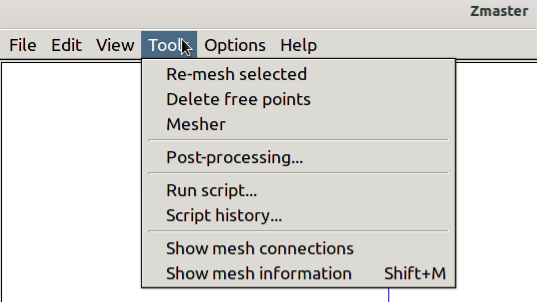
Tools tab#
Commands |
Description |
|---|---|
|
Re-mesh the selected domain (when Geom main command is active). This can be useful for visualization after making modifications (e.g., changing the number of edge nodes) without needing to re-mesh the entire model. |
|
Remove unconnected points in the mesh. |
|
Create post-processing (when Results or Plot main commands are active). |
|
show the script that captures the modifications made to the model through the GUI interface. |
|
for a chosen node, element or elset, show the connected nsets, bsets elements and elsets. |
|
show the mesh information such as dimension, nomber of nodes, number of elements, element types, nsets, bsets and elsets. |
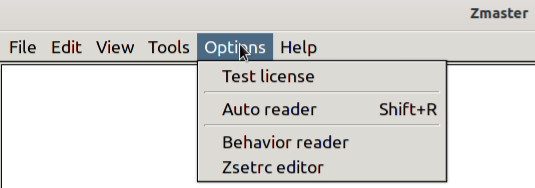
Options tab#
Commands |
Description |
|---|---|
|
allow to test the licenses for differents modules and show their expiring date. |
|
opens Zair GUI (to read or create input file) |
|
opens Zair GUI (to read or create material input file) |
|
this command is used to set global parameters. |
Batch mode operation#
Running Zmaster with the -B switch (or Zrun with -B) will run Zmaster in batch mode.
The problem .mast file will be read, and if there are meshing commands a .geof file will be generated and written.
Keys and basic interaction#
Some keyboard and mouse interactions which are used throughout Zmaster are summarized below. The following notation is used for applicable modifiers:
CODE |
DESCRIPTION |
|---|---|
cmd |
alt on Linux, ctrl on Windows |
LB |
left mouse button |
MB |
middle button (or right on Windows) |
The following operations are commonly used:
CODE |
DESCRIPTION |
|---|---|
|
select |
|
drag to move image |
|
drag to zoom image |
|
continue selection (careful) |
|
get info (careful on 3d meshes.. takes a while) |
|
auto-center graphic in view window |
|
group multi-selects |
|
un-group selected |
|
modify selected if possible |
|
quit immediately |
|
redo (if possible) |
|
save .geof .mast file for curr pb name |
|
view options |
|
undo (if possible) |
|
try to delete selected |
|
mesh currently selected domain |
Import file type extensions#
Various imports are available according to the input file name extension. The following table catalogs these file extensions. Note that all file names are converted to lower case in the process of detection.
CODE |
DESCRIPTION |
|---|---|
|
the main Zmaster file. Geometry information, as well as user configuration such as views, post calculations, meshers, etc. |
|
a Zebulon mesh file. if a |
|
an IGES file translated to Zmaster geometry. |
|
Abaqus input mesh file (probably from a file originally ending with |
|
Abaqus results file (to be opened using Zodb command) |
|
Abaqus results file. |
|
Ansys results file. |
|
Samcef results files |
|
FORGE ®, THERCAST ®, and TRANSWELD ® files. |
|
ADVENTURECluster results file. |
|
MeshGems mesh files. |
|
GMSH mesh file (Only MeshFormat=2 is supported). |
|
cosmos mesh file. |
|
CIMLIB files |
Export file type extensions#
When the Save menu item is selected, or Cmd-S is pressed, the problem will be saved.
If the problem was originally loaded from a file, all relevant Zebulon formats will be saved,
such as problem.mast and problem.geof.
If the model was created during the current session, a popup will appear asking for a file name. It is important to include a known file extension in the file name when saving.
CODE |
DESCRIPTION |
|---|---|
|
Zebulon formats will be saved. |
|
IGES geometry format. |
Use on Windows 64bits platforms#
For Microsoft Windows platforms, here are some recommendations to enhance user interaction through the Zmaster GUI program:
The executable location is used to determine a pseudo-environment variable for
$Z7PATH, and it is therefore very important that the directory structure of the distribution be maintained.The input/output file structure including file extensions are designed from a Linux standpoint, and may be less than convenient on Windows. We strongly recommend keeping a separate folder for each problem run.
We recommend launching Zmaster from command line using Windows Command Prompt. An example would be:
Zmaster model.geof
It is also possible to launch Zmaster with a problem dropped on the Zmaster icon (or its Desktop Shortcut if the user has created it). This automatically sets the problem directory and is very simple to do. Otherwise double clicking on many of the Z-set files will open Zmaster as well.

A view in the main graphics pane can be copied and pasted into other applications. The clipboard data is an enhanced Windows metafile, and therefore can be scaled and printed at high resolution. For large models however, the re-drawing of the metafile in the application where it is pasted can be slow.